📦 Catalog Management
Learn how to build and manage your product catalog on Africa Conglomerate — from creating categories and adding products to uploading images, setting pricing tiers, and publishing your listings to buyers.
- Your company account must be approved (see Account Setup)
- You must have a B2B account with Seller or Admin role (the Catalog section only appears for roles that can approve orders)
- Product images ready (JPG/PNG, recommended 800×800 px)
- Know your company's vertical (Agricultural Products, Arts & Crafts, Tours & Travel, Shipping, or General Commerce) — it decides which product form you use
- General Commerce companies create and edit products directly in Catalog → Products.
- Agricultural Products and Arts & Crafts companies create and edit products in their
vertical app (
/agriproducts/or/arts_en_crafts/). Every product saved there is automatically synced ("federated") into the shared catalog. If you open a vertical product's Edit or Delete page from the catalog, you are redirected to the vertical app with an information message. - Shipping and Tours & Travel companies see the section labelled Service Catalog with Services, Service Categories and New Service instead of Products / Categories / New Product.
Part 1 — Create a Category
Categories organise your products into logical groups that buyers can filter by in the shop. A category is optional on the product form, but creating one first makes your products easier to find.
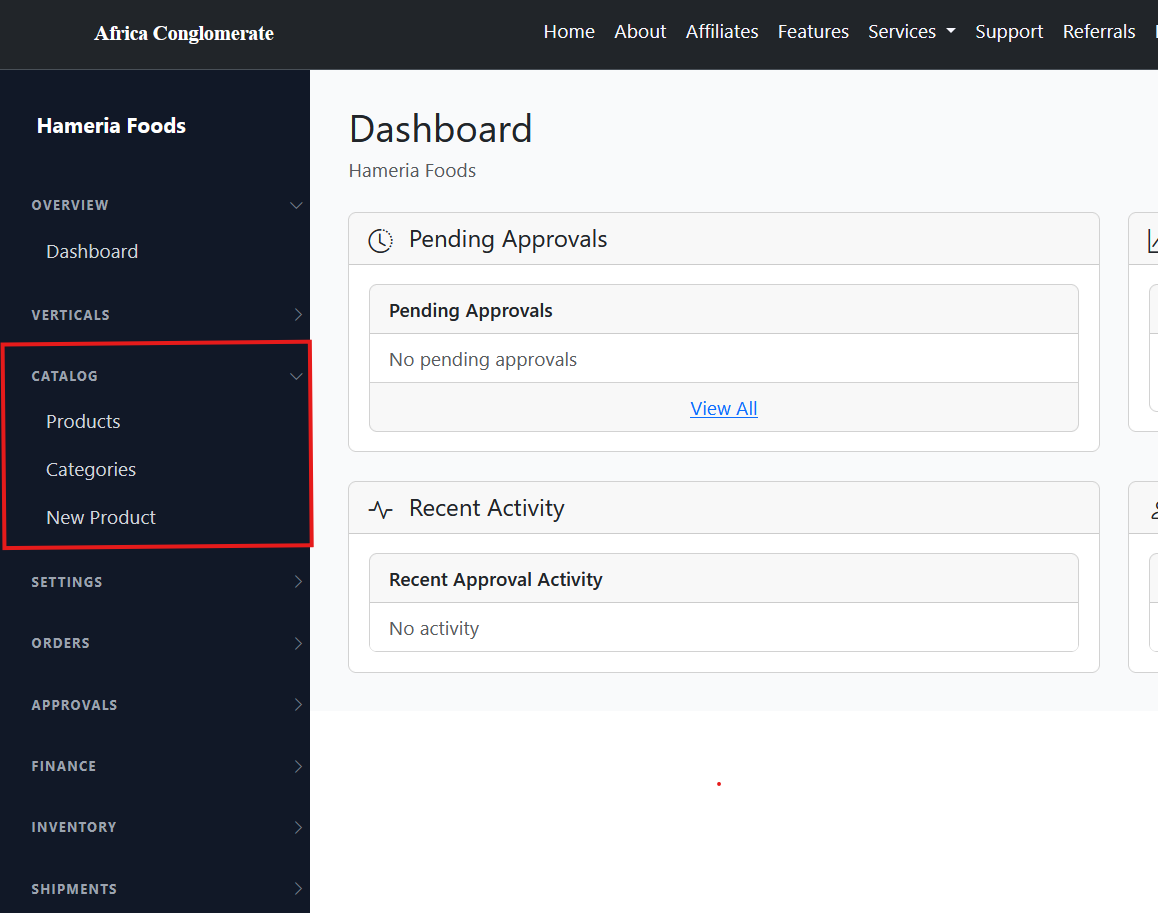
Navigate to the Catalog Section
From your dashboard, click Catalog in the left navigation
panel, then select Categories (Shipping and Tours & Travel
companies: Service Catalog → Service Categories). The page is
/catalog/categories/.
Create a New Category
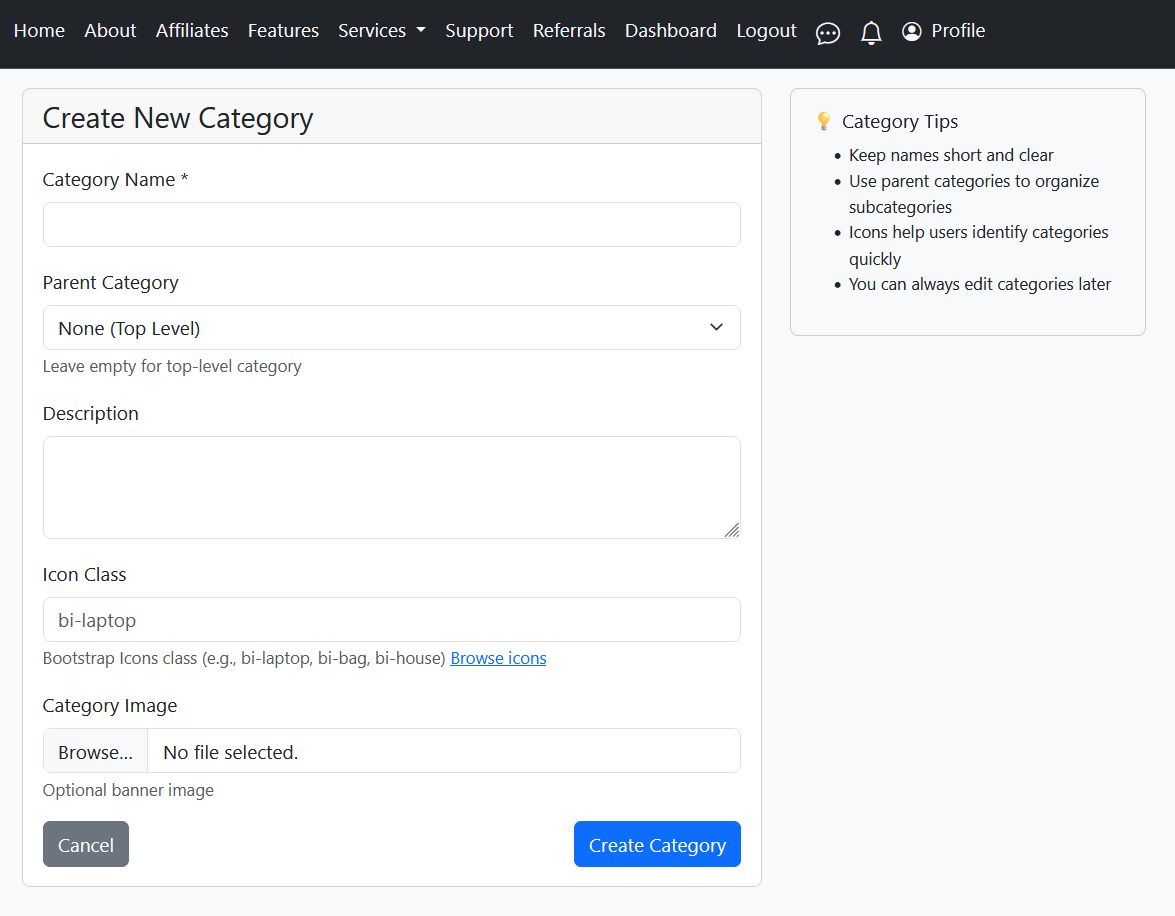
Click New Category. Fill in the following fields:
- Category Name * — e.g. "Fresh Produce" or "Office Supplies"
- Parent Category — optional, for creating sub-categories
- Description — a short summary shown to buyers
- Icon Class — optional icon name
- Category Image — optional image
Click Create Category when done. Categories belong to your organisation and are shared by all of its companies.
Part 2 — Add a Product
Products are the individual items buyers can purchase. Each product can belong to a category and can have multiple images, pricing tiers, and stock levels. The product form itself only captures the product details and its base price — pricing tiers and stock are added afterwards (steps 6 and 7).
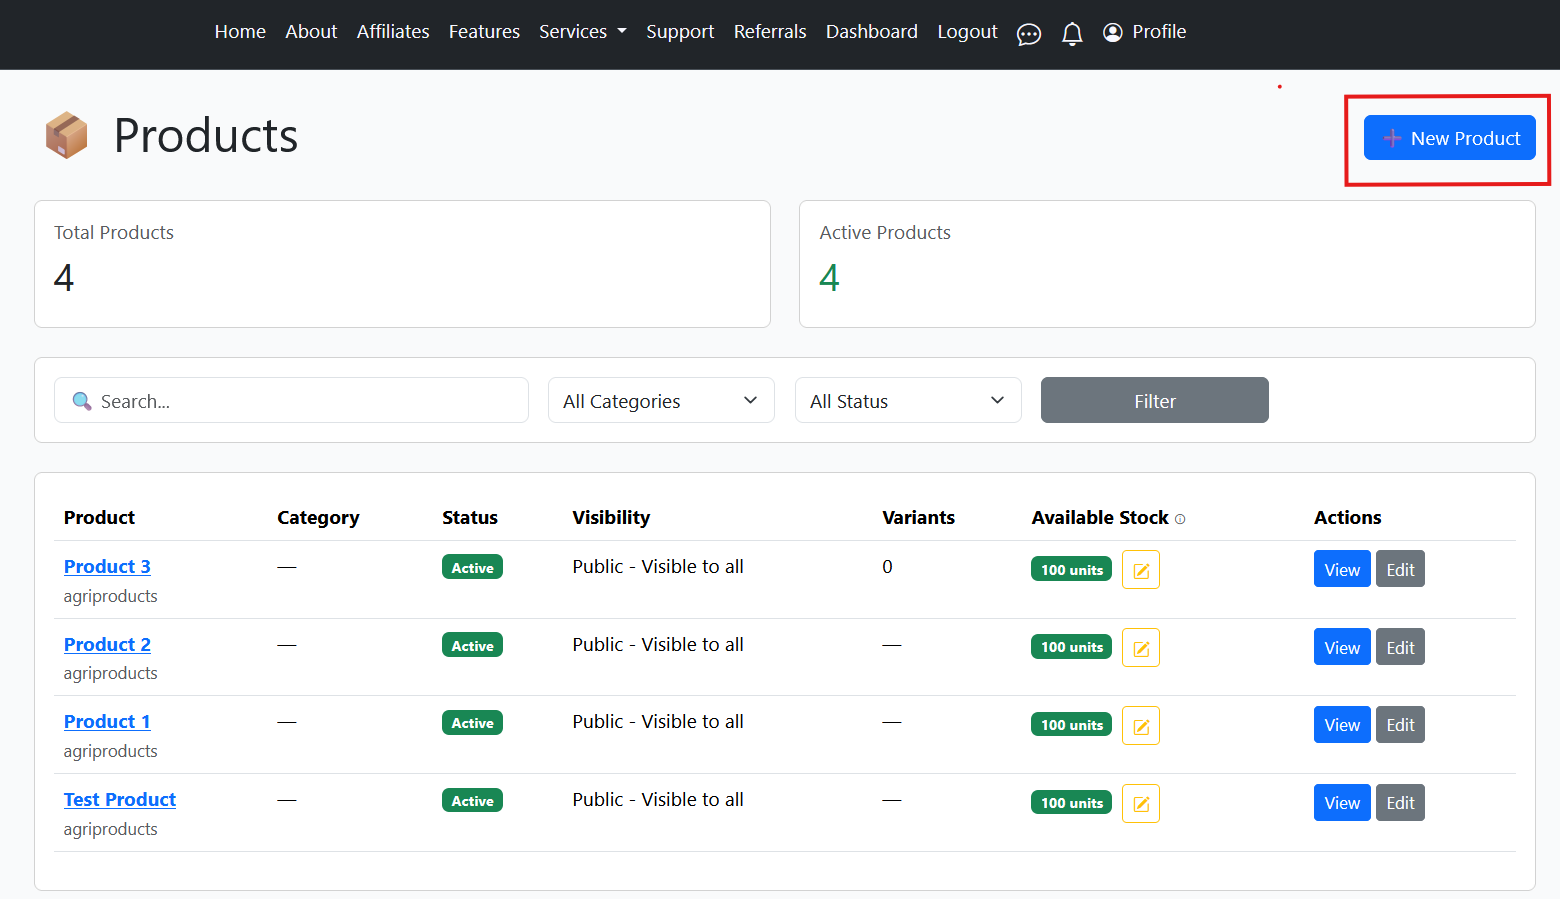
Open the New Product Form
Click New Product in the Catalog section of the sidebar (or open Catalog → Products and click ➕ New Product).
- General Commerce companies land on the catalog form
(
/catalog/products/create/). - Agricultural Products companies land on the Agri form
(
/agriproducts/create/); Arts & Crafts companies land on the Arts & Crafts form (/arts_en_crafts/create/). If you open the catalog create page directly, you are redirected there with the message "Your account is registered under the … vertical. Use the vertical form to list your products."
Fill in Product Details
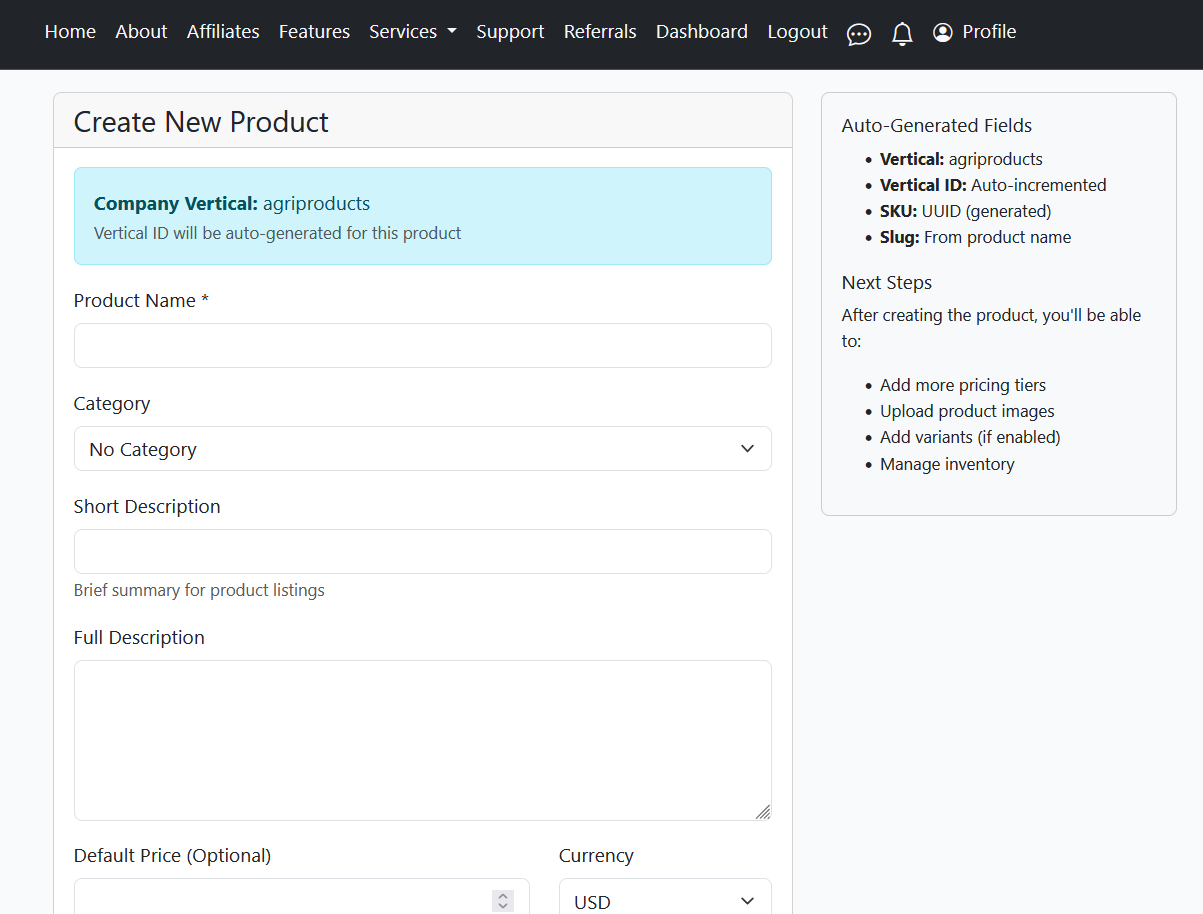
Complete all required fields marked with an asterisk (*). The SKU is generated automatically — you do not type one.
Catalog form (General Commerce):
- Product Name * — clear, descriptive title
- Category — select the category you created (optional)
- Short Description and Full Description — shown to buyers
- Default Price and Currency — optional here; becomes the product's first price row
- Visibility — who can see the product in the shop
- Minimum Order Quantity / Maximum Order Quantity
- Track inventory — leave ticked if you will manage stock for this product
Vertical forms (Agri, Arts & Crafts): Name *, Description, Company *, Category, Price * and Currency * (this becomes the base price in the catalog), plus vertical-specific fields — for Agri: Harvest Season *, Shelf Life *, Unit Type *, Min Order Qty *; for Arts & Crafts: Artist Name *, Medium *, Condition *, Dimensions, and so on.
Upload Product Images
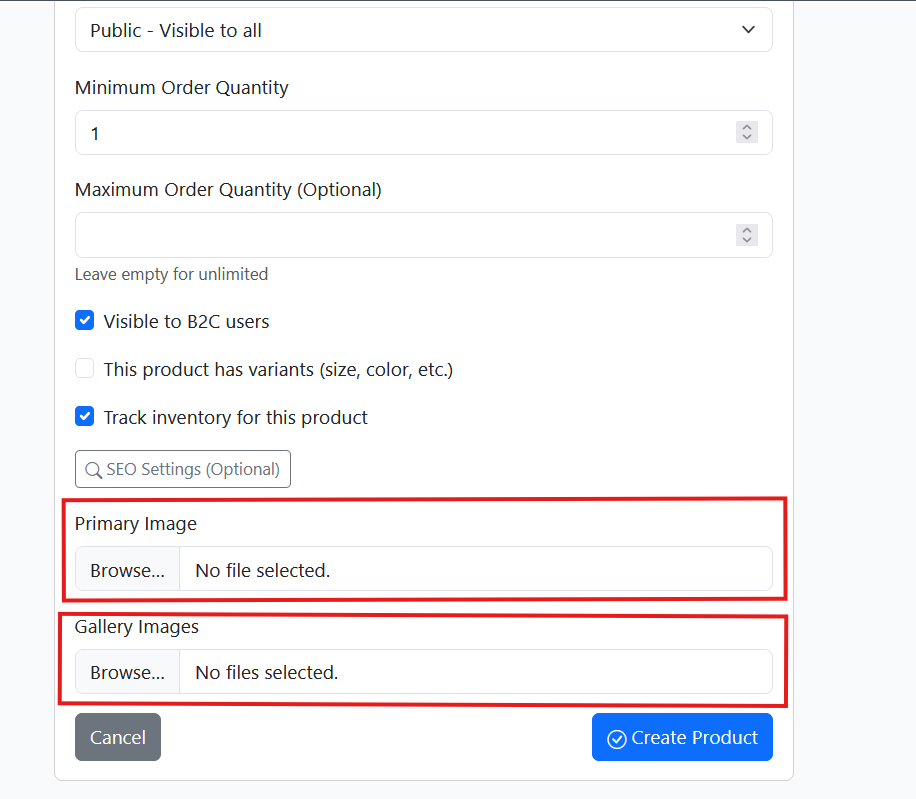
On the catalog form, choose a Primary Image and, optionally, several Gallery Images. The primary image is the thumbnail shown in search results and the shop grid. On the Agri form there is a single Image field; on the Arts & Crafts form there are Primary Image, Image 2 and Image 3.
- Accepted formats: JPG, PNG, WebP
- Recommended size: 800 × 800 px (square)
- General Commerce products: after saving, the catalog edit page lets you delete images or set a different one as primary
Set Pricing Tiers
Pricing tiers are managed on the shared pricing panel, after the product has been saved:
- General Commerce: open the product from Catalog → Products
and click Manage Pricing (
/catalog/products/<id>/pricing/). - Agri / Arts & Crafts: open the product's edit page in the vertical app and switch to the Pricing tab. The Base Price card shows the price and currency from the Details tab with an Auto-synced badge — it is updated every time you save the product and cannot be deleted from the panel.
Click Add Tier and fill in Currency, Customer Tier (Retail, Wholesale or VIP), Unit Price and Minimum Quantity, then click Save Tier. Use a minimum quantity greater than 1 to create a volume band, e.g. 10+ units at a lower unit price. Each currency + tier + minimum quantity combination is one row.

Set Initial Stock Level
Stock is not entered on the product form — it is managed in the
Inventory module. After saving the product, open
Catalog → Products (/catalog/products/) and click the
+ button in the Stock column, or go to
Inventory → Add Stock. The Add Stock form asks for the
warehouse, the quantity and an optional Reorder Point — when available
stock falls to that point a low-stock alert appears under Inventory → Alerts.
Later changes are made with Adjust on the stock item (add or remove units).
The shop shows In Stock, Low Stock (N left) (10 or fewer) or Out of Stock from the live inventory balance (on hand minus reserved). A product with no stock record shows no badge at all. Buyers cannot add an out-of-stock product to the cart.

Save the Product
When all details are complete, click Create Product. There is no separate draft state: a new product is active immediately. Use the Visibility setting (catalog form) or untick Active (vertical forms) to keep a product out of the shop while you finish it.
- Catalog form: you are taken to the product's edit page with the message "Product … created successfully!".
- Vertical forms: you are taken to the product's detail page with the message "Product … created successfully! It will be automatically synced to the main catalog." The product then appears in Catalog → Products with a Price synced badge in the Sync column.


Part 3 — Editing and Deleting Products
- General Commerce: Catalog → Products → Edit opens the catalog edit page. The Delete Product button offers Deactivate (soft delete) or a permanent delete when the product has no orders.
- Agri / Arts & Crafts: edit and delete from the vertical app (the Edit, Sync and Delete buttons on the product's detail page). The catalog Edit and Delete pages redirect you there with the message "… belongs to the … vertical. Please edit it from the vertical app." Deleting in the vertical deactivates the catalog copy automatically.
- The vertical product list shows sync-health badges: Not Synced, Name Drift (catalog name differs) or No Price (price is 0). Re-saving the product in the vertical pushes the correct data to the catalog and clears the badges.