👤 Account Setup
Learn how to create your Africa Conglomerate account, choose the right account type, verify your identity, and complete your profile so you can start buying or selling on the platform.
- A valid email address you have access to
- If registering as a business (B2B): your company name and tax ID (optional at signup)
- A profile photo or company logo (optional, can be added later)
Step 1 — Create Your Account
Navigate to the Africa Conglomerate sign-up page. You will be asked to provide your email address and choose a secure password. Your email will serve as your login username on the platform.
Go to the Registration Page
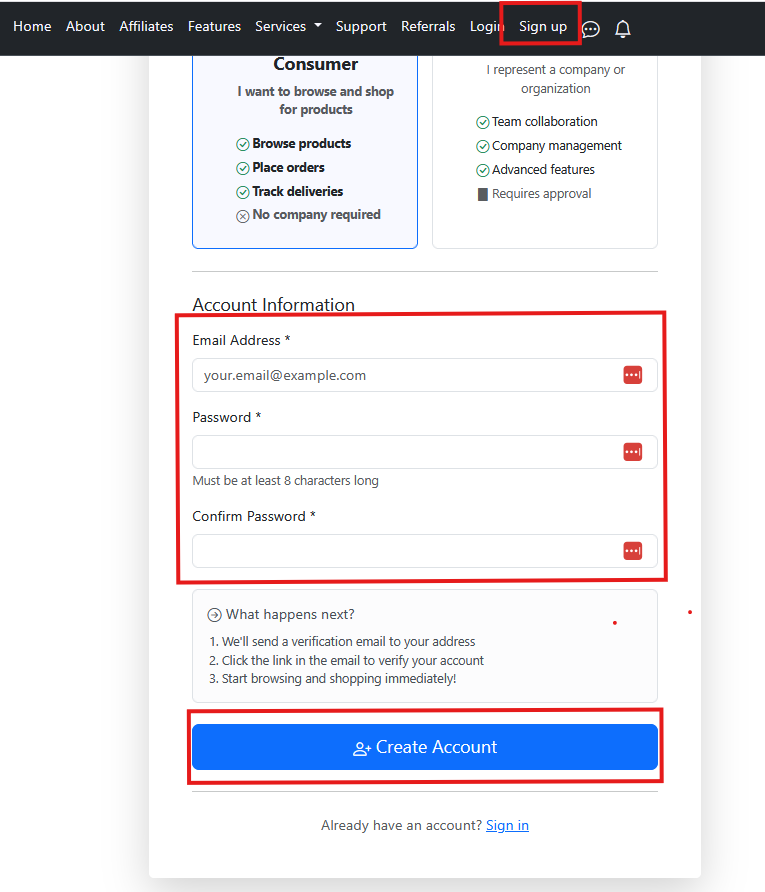
Click Sign Up on the homepage or navigate to
/accounts/signup/. You will see a form asking for your
email address and password.
Choose Your Account Type
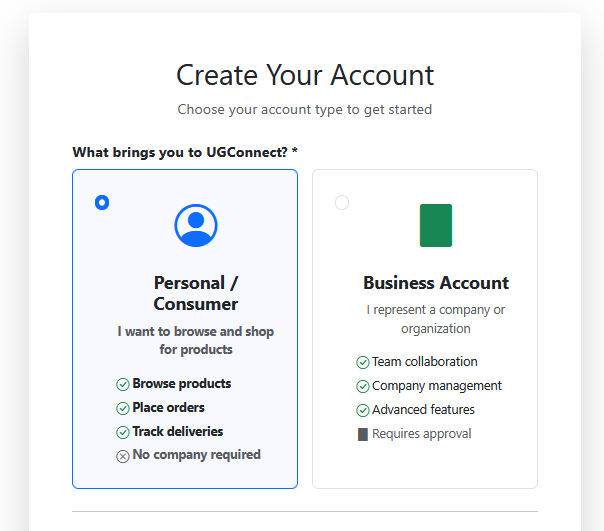
Select whether you are registering as an Individual Consumer (B2C) or a Business (B2B). This determines what features are available to you:
- B2C (Consumer) — Browse, purchase products, and track orders.
- B2B (Business) — All consumer features plus: list products, manage a company, set up approval workflows, and access invoicing.
Submit the Registration Form
Click Create Account. The platform will send a verification email to the address you provided. Check your inbox (and spam folder) for a message from Africa Conglomerate.
Step 2 — Verify Your Email
Email verification confirms that you own the address used to register. Until your email is verified, some platform features will be restricted.
Open the Verification Email
Look for an email with the subject "Verify your Africa Conglomerate account". Open it and click the Verify Email button or copy the link into your browser.

Confirmation Page
After clicking the link you will be redirected to a confirmation page. Your account is now active. You can log in immediately.

Step 3 — Set Up or Join a Company (B2B Only)
When you choose Business during sign-up, the same form asks whether you want to create a new organisation or join an existing one. This links your account to an organisation and unlocks B2B features such as roles, approval workflows, and invoicing.
Option A — Create a New Organisation (you become the Owner)
On the sign-up form, choose Create a new organisation and enter your organisation name. If you have a company registration number, add it — supplying it enables instant approval once your email is verified. Without it, your organisation is queued for a quick platform-staff review (usually within one business day). You can refine the tax ID, vertical, and address later under Company Profile.

Option B — Join an Existing Organisation (you become a Member)
Choose Join an existing organisation at sign-up and select
your employer's organisation. Your request is created as pending
and an organisation admin must approve it before you get access. Alternatively,
an admin can invite you directly from Team Members → Invite Member
(/accounts/team/invite/), assigning the role you should have.

Wait for Approval Notification
You will receive an email notification when your company application is approved or when your membership invite is confirmed. Once approved, your dashboard will display your company name and B2B features will be unlocked.

Step 4 — Complete Your Profile
A complete profile builds trust with buyers and sellers. Fill in all optional fields to present a professional presence on the platform.
Update Your Profile Details
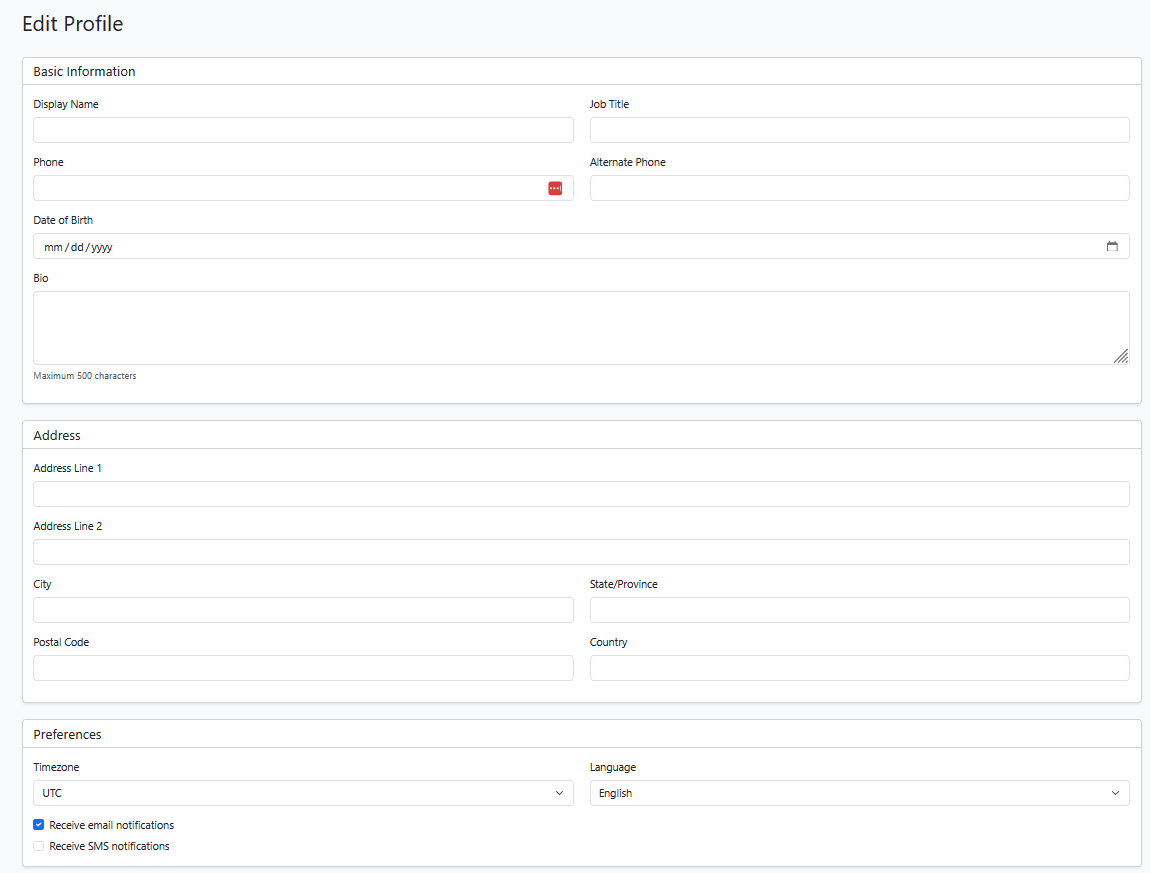
Go to Account → My Profile → Edit Profile. Add your first and last name, phone number, and any other optional details. For B2B users, add your job title and department.
Upload a Profile Photo or Company Logo
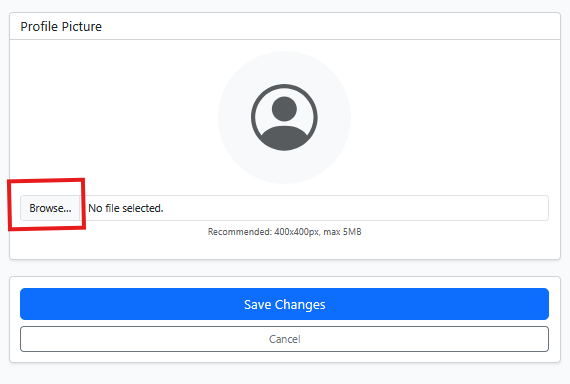
Click Change Photo (or Upload Logo for company profiles). Accepted formats are JPG and PNG, maximum 5 MB. Your photo appears next to your name in messages, orders, and the marketplace directory.